CSV Export Module
Guide to Export Management and CRM Module Field Mapping
- Introduction
- Plugin License Management
- Basic Information – Homepage
- Module Management from Homepage
- Adding a Module
- Managing Existing Modules
- Modifying Existing Configurations
- Export File Configuration
- Export Settings
- Data Format Type
- Character Encoding
- Date Format
- Numeric Precision
- Write Mode
- Text Delimiter
- Separation Configurations
- Output File/Folder Management
- Field Mapping
- Product Block - Special Configuration
- Mapping Save
Introduction
Presentation
The plugin is an advanced tool for exporting data in CSV format, designed to simplify and automate the extraction of information from multiple database tables. It provides an intuitive interface that allows users to easily configure export options, customize data formats, and map fields according to their specific needs.

A step-by-step wizard guides users through the entire configuration process, ensuring a smooth and professional experience even for non-technical users.
Usage Requirements
To use the CSV Export Module, the plugin must be properly installed and activated within the vtenext environment.
At the end of the installation process, it is essential to verify that no errors occurred and that the plugin appears as active in the Installed Modules section. An incomplete installation or a disabled plugin will prevent the export process from functioning correctly.
It is also necessary to ensure that the folder storage/CSVExporter/ has the appropriate write permissions. Otherwise, the system will not be able to generate or save the exported CSV files.
Finally, some basic user knowledge is required, particularly in the following four areas:
-
CRM module knowledge: understanding the structure of the modules to be exported, the types of fields used, relationships between entities, and business logic.
-
CSV format basics : familiarity with field separators (
;,,), text delimiters ("), line endings, and compatibility with software such as Excel, LibreOffice, or Google Sheets. -
Character encoding management: using UTF-8 encoding to ensure correct display of accents, symbols, and special characters in exported files.
-
File organization: managing folder structures, applying consistent file naming, and implementing backup strategies to maintain order and data security.
Plugin License Management
The behavior of the VTE plugin license management varies depending on the installation status and the validity of the current license.
First Installation
When the plugin is installed for the first time, or when no valid license is available, the system requires the user to enter a license key in order to enable the module’s features.
License Entry Screen
The system displays a dedicated screen with the following elements:
-
Information message: “A valid license is required to use this module”
-
Input field: Text area for entering the license key
-
Instructions: “Enter the provided license key and click ‘Verify’”
-
VERIFY button: Validates the entered license key
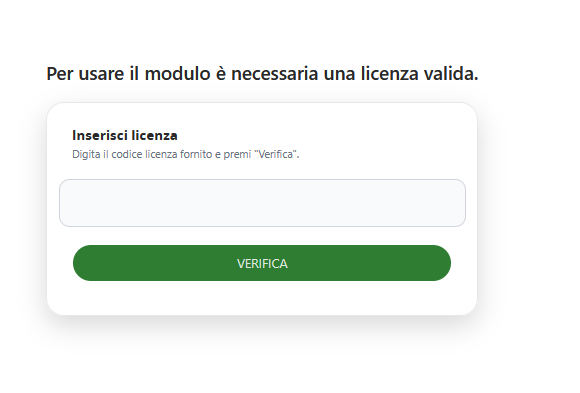
Verification Process
-
Enter the license key in the designated field
-
Click the green VERIFY button
-
The system automatically validates the key
-
If the key is valid, the plugin is activated
-
If the key is invalid, an error message is displayed
Existing Installation with License
When the plugin is already installed and a license is present (whether valid or expired), the interface provides advanced license management options through dedicated buttons available on the homepage.

“Update License” Button
-
Location: Visible in the top bar of the homepage (Version 1.0)
-
Function: Allows the user to enter a new license key or update the existing one
-
Use case: Required when the current license has expired or when switching to a different license
License Update Window
When the user clicks Update License, the system displays a modal window with the following elements:
-
Information message: “A valid license is required to use this module”
-
Insert License section: Dedicated area for entering the new license key
-
Text field: For entering the provided license code
-
Instructions: “Enter the provided license key and click ‘Verify’”
-
CANCEL button: Closes the window without making changes
-
VERIFY button: Validates the newly entered license key
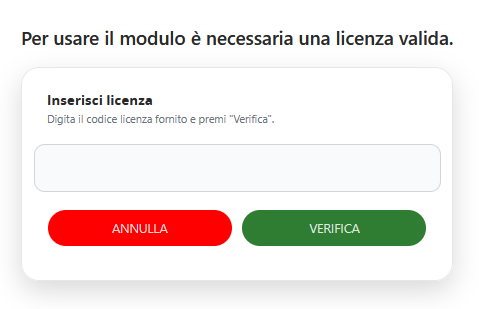
The system automatically detects the license status and, in case of an error or expired license, displays an error message.
Basic Information – Homepage
Step 1 wizard
Module Management from Homepage
The Homepage serves as the primary control center for managing all CSV export configurations. This interface provides a comprehensive overview of all configured modules and delivers immediate access to the plugin's core functionality.
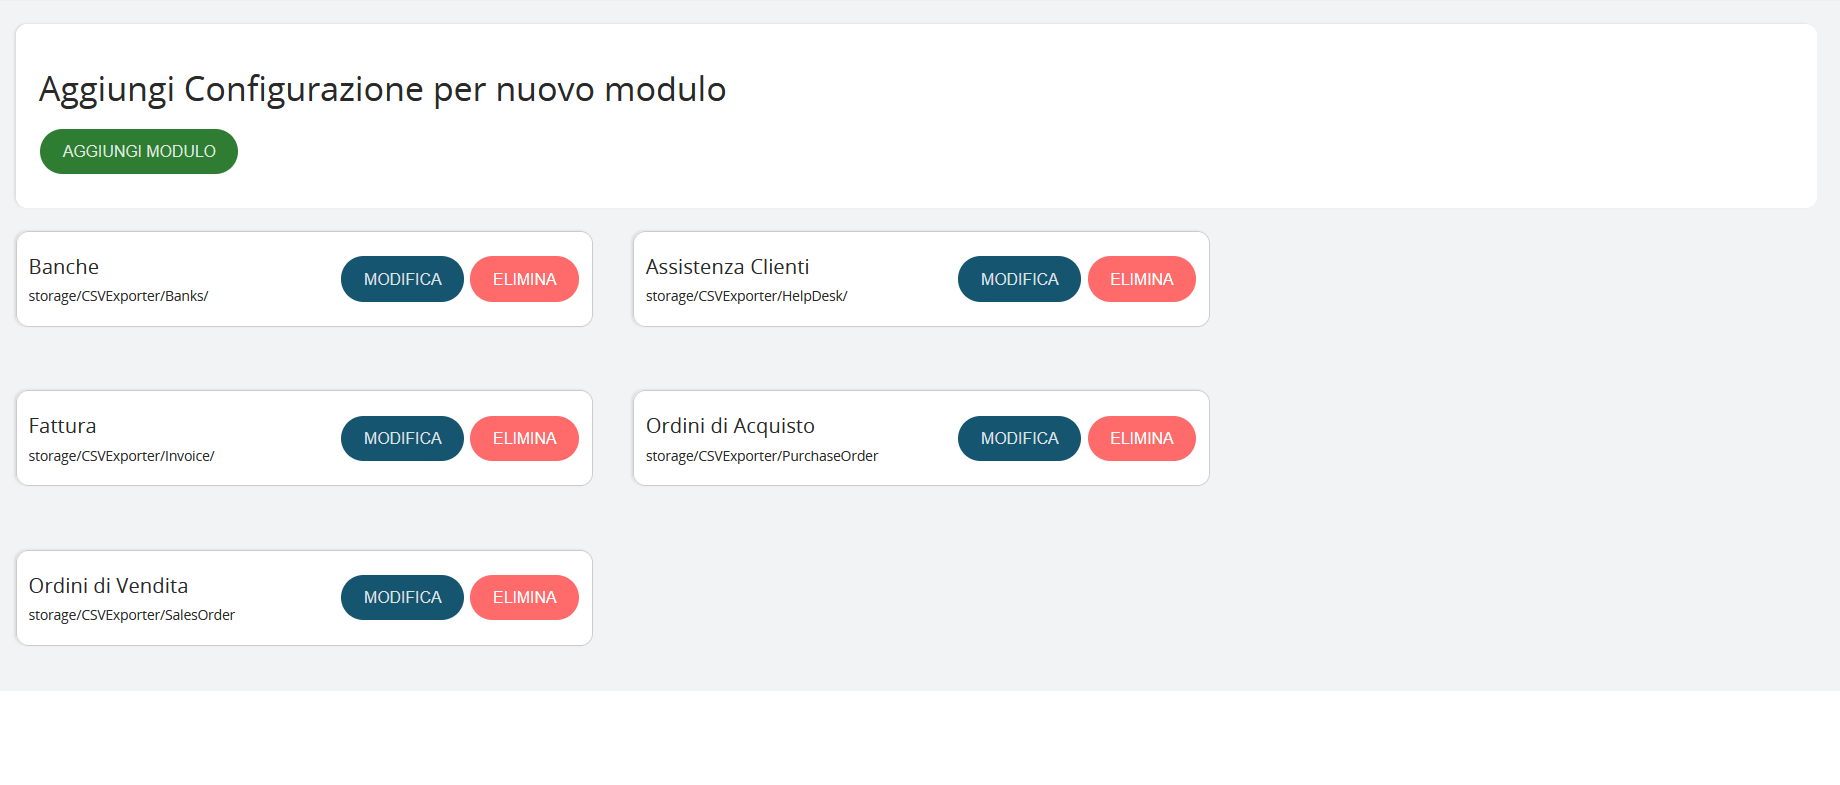
Configured Module Display
The homepage displays all previously configured export modules, organized in information cards that show:
- Module name (e.g., Banks, Customer Support, Invoice)
- Storage path (e.g., storage/CSVExporter/Banks/)
- Available actions for each module
Important: Changes are permanently applied only after completing the entire wizard process and clicking "SAVE" in the final step. Until that point, all modifications can be canceled without affecting the existing configuration.
Adding a Module
Creating New Configurations
To create a new export configuration, the homepage provides the "ADD MODULE" button:

- Click the green "ADD MODULE" button
- The system automatically opens the 5-step configuration wizard
- The wizard guides you through all configuration aspects:
- CRM module selection for export
- Field definition for inclusion
- Format and separator configuration
- Filter setup and advanced options
- Configuration save for future use
Managing Existing Modules
Two main actions are available for each configured module:

- "Edit" button: provides access to the configuration wizard to modify the existing configuration. This function allows you to:
- Update fields to be exported
- Modify filters and selection criteria
- Change formatting options
- Adjust the module's export logic
- "DELETE" button: permanently removes the selected configuration. To ensure data security, the system implements a confirmation procedure that:
- Displays a warning message before deletion
- Requires explicit user confirmation

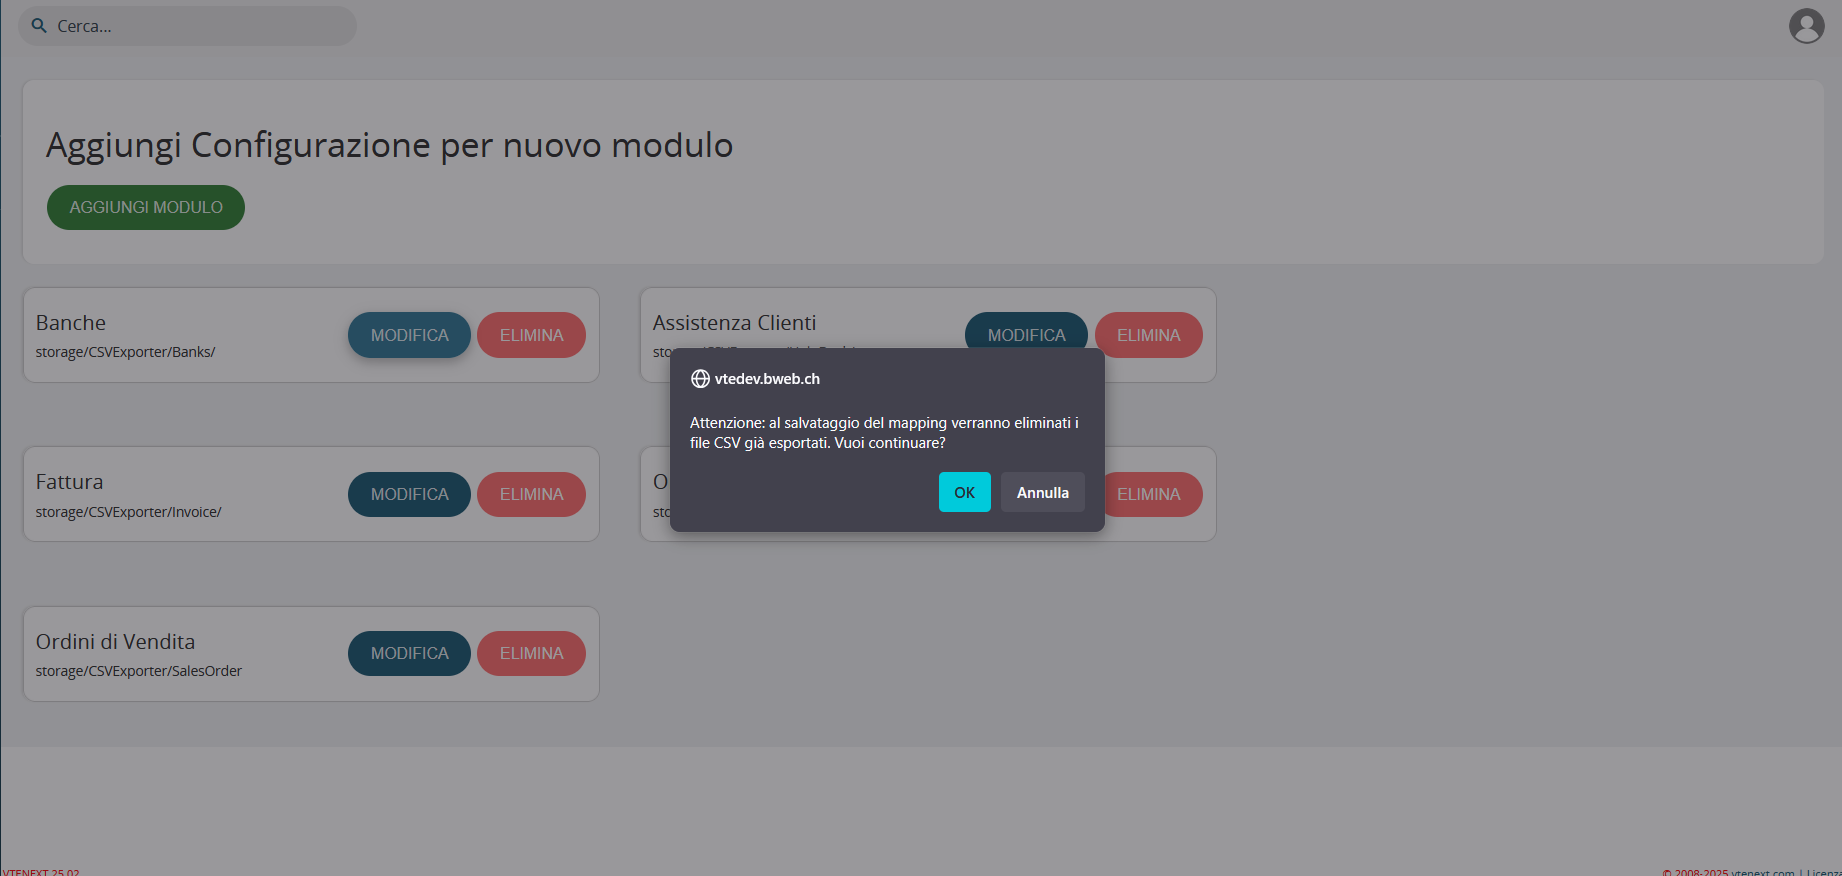
Modifying Existing Configurations
Modifying Existing Configurations
To modify an already created configuration, the process is equally intuitive:
Modification Procedure:
- Locate the module to be modified in the homepage list
- Click the "EDIT" button corresponding to the desired module
- The system will automatically load the current configuration into the wizard
- The wizard allows you to modify all configuration aspects:
- Add or remove fields from the export
- Change separators, date formats, and numeric options
- Modify file name, description, or destination folder
- Adjust filters and selection criteria
Export File Configuration
Step 2 Wizard
Export Settings
The second step of the wizard represents the core of technical configuration, where all parameters that determine how data will be extracted, formatted, and saved in the final CSV file are defined. This section is divided into several thematic areas that allow granular control over every aspect of the export:
- Data Format Type
- Character Encoding
- Date Format
- Numeric Precision
- Write Mode
- Text Delimiter
- Separation Configurations
- Output File/Folder Management
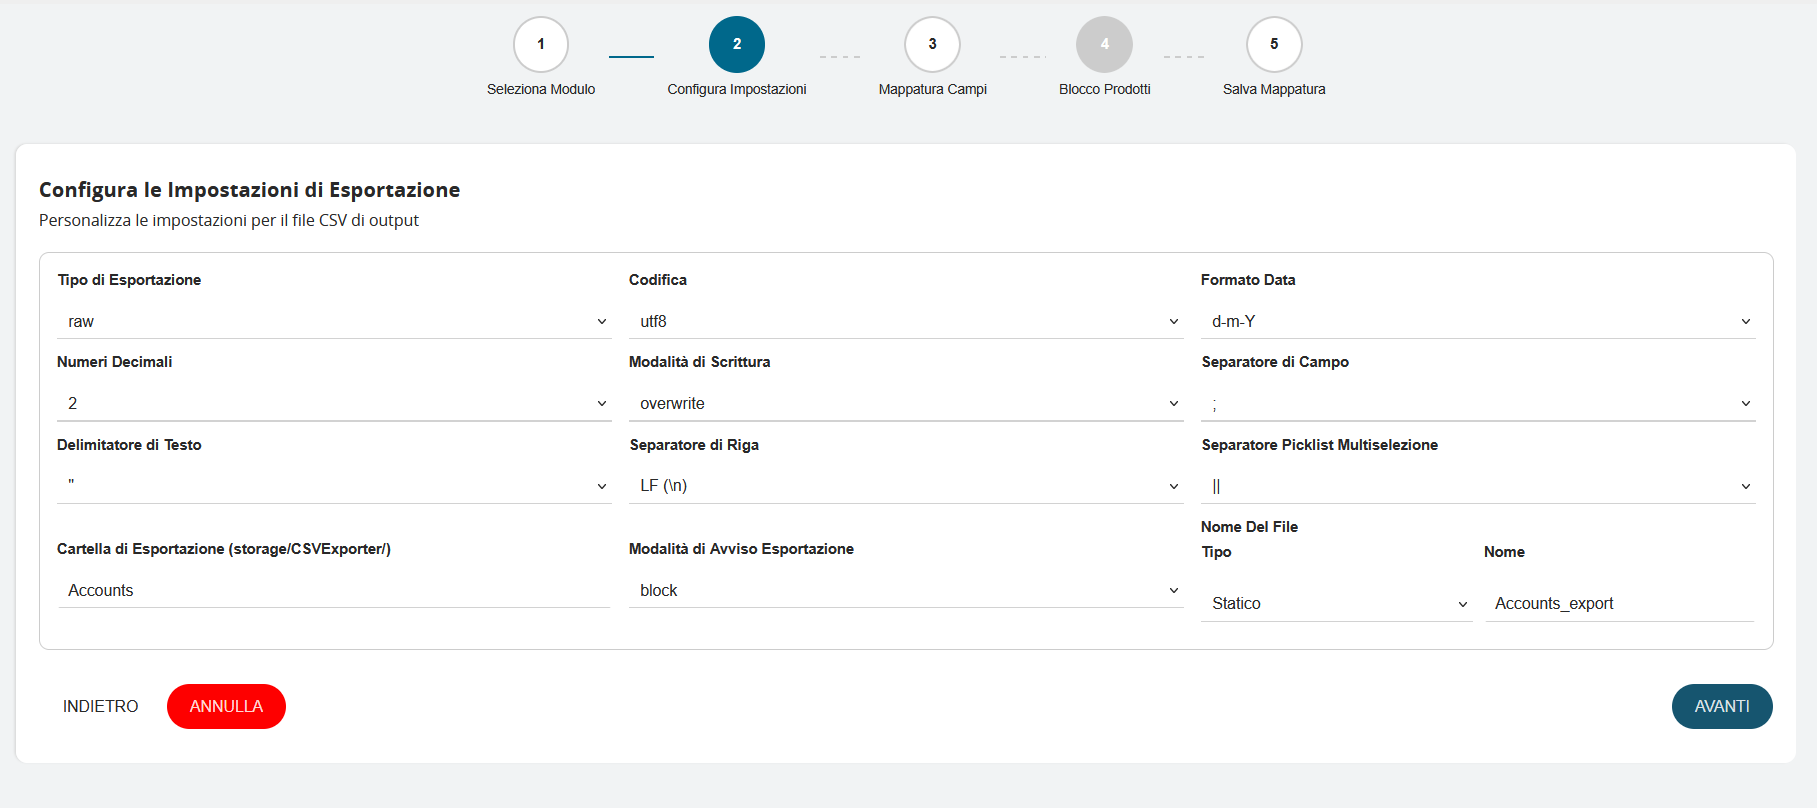
Data Format Type
The Export Type field offers two distinct modes for extracting and formatting data from the database:
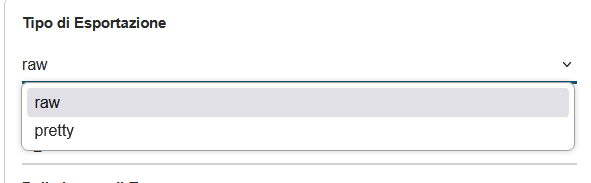
- Raw: This mode represents the most direct and performant approach for data export. When this option is selected, the system:
- Extracts data directly from the database without applying any additional processing
- Maintains values exactly as they are stored in the system
- Preserves maximum fidelity of original information
- Ensures optimal export speed, particularly important for large data volumes
- Is ideal for technical analysis, data backups, or when absolute information integrity must be preserved
- Pretty (Formatted Data): This mode applies a series of processing operations to make data more readable and user-friendly:
- Formats values according to CRM display settings
- Converts internal codes to descriptive labels
- Applies specific formatting rules for each field type
- Translates picklist values to their textual equivalents
- Is optimal for reports intended for human reading or presentations
The choice between these two modes depends on the final use of the CSV file: use "raw" for technical processing and "pretty" for reports and analysis intended for direct consultation.
Character Encoding
Character Encoding
The "Encoding" field determines the character set used to save the CSV file, directly affecting the compatibility and readability of exported data. The system offers four main options:
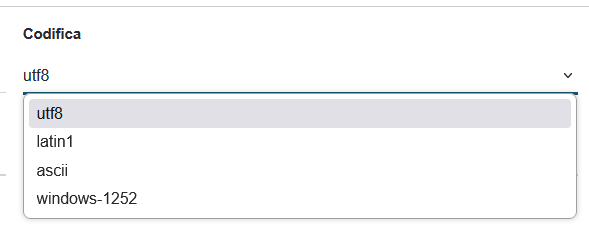
-
UTF-8 (Unicode Transformation Format - 8 bit): represents the modern international standard and the recommended choice:
- Supports all Latin alphabet characters, including accents and special characters (à, è, ì, ò, ù, ç)
- Handles international symbols, Cyrillic, Greek, Arabic, and Asian characters
- Ensures correct display in modern software (Excel, LibreOffice, Google Sheets)
- Preserves the integrity of names, addresses, and descriptions containing accented characters
-
Latin1 (ISO-8859-1): is an older Western European encoding:
- Supports Latin alphabet characters with accents used in Western Europe
- Compatible with legacy systems and older software
- Slightly reduced file sizes compared to UTF-8
- Limited in handling non-European characters
-
ASCII (American Standard Code for Information Interchange): the most basic and limited:
- Supports only basic English alphabet characters (A-Z, a-z, 0-9)
- Does not handle accents, special characters, or international symbols
- Maximum compatibility with very old systems
- Not recommended for Italian or international content
-
Windows-1252 (CP-1252): specific to Windows systems:
- ASCII extension that includes Western European characters
- Optimal compatibility with previous versions of Microsoft Excel
- Supports accented characters and some special symbols
- May cause display issues on non-Windows systems
Recommendation: For most use cases, especially in Italian contexts, UTF-8 is recommended for its universality and compatibility with modern software. Use alternative encodings only in specific cases of legacy system compatibility.
Date Format
The "Date Format" field defines how dates will be represented in the exported CSV file. The system offers five distinct formats to adapt to different geographical needs and software compatibility requirements.
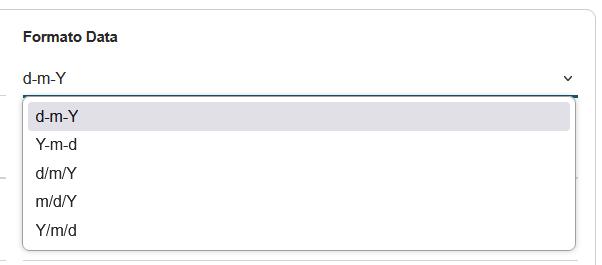
The "d-m-Y" (day-month-year) format standardizes date representation according to the European format. This setting ensures consistency in date display and facilitates data processing by analysis software or spreadsheets configured for the Italian format.
Numeric Precision
The "Decimal Numbers" field controls the numeric precision of all decimal values in the exported CSV file. The system offers five precision levels, from 1 to 5 decimal places:
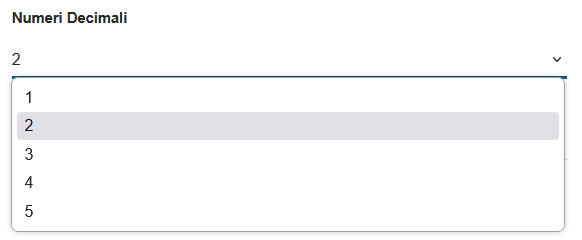
Two decimal places represent the ideal compromise for most business CSV exports, ensuring precise data without unnecessarily increasing file size or compromising readability.
Write Mode
The "Write Mode" field determines system behavior when a CSV file with the same name already exists in the destination folder. The system offers two distinct approaches:
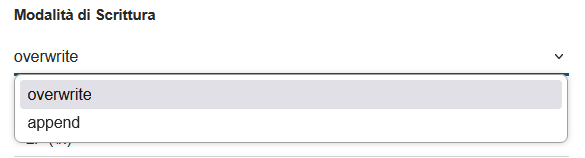
- Overwrite: represents the complete replacement approach.
- Advantages:
- Always ensures updated and consistent data
- Prevents accumulation of duplicate files
- Maintains clean folder organization
- Disadvantages:
- Permanent loss of the previous version
- Inability to recover historical data
- Ideal usage: Recurring exports where only the most recent version is needed
- Advantages:
- Append: adds new data to the existing file, with new records queued at the end of the existing file.
- Advantages:
- Preserves all historical data
- Creates a cumulative archive over time
- Allows trend analysis and temporal comparisons
- Disadvantages:
- Possible data duplication
- Files growing in size over time
- Need to manage multiple headers
- Ideal usage: Activity logs, historical archives, incremental data collection
- Advantages:
Text Delimiter
The "Text Delimiter" field defines the character used to enclose text fields in the CSV file, ensuring correct data interpretation even when they contain special characters. The system offers three main options:
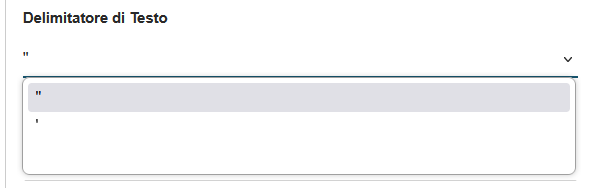
- Double Quotes (") - Recommended Double quotes represent the international standard for CSV files:
- Example: "Mario Rossi","Via Roma, 123","Milano"
- Advantages:
- Universal standard recognized by all software
- Protects fields containing commas (field separator)
- Correctly handles text with leading/trailing spaces
- Guaranteed compatibility with Excel, LibreOffice, Google Sheets
- Usage: Recommended for all standard exports
- Single Quotes (') Single quotes offer a less common alternative:
- Example: 'Mario Rossi','Via Roma, 123','Milano'
- Advantages:
- Useful when text frequently contains double quotes
- Reduces the need for character escaping
- Disadvantages:
- Less compatible with standard software
- May cause interpretation issues
- Usage: Only in specific cases or for compatibility with particular systems
- No Delimiter The no delimiter option eliminates any protection character:
- Example: Mario Rossi,Via Roma 123,Milano
- Advantages:
- Lighter and more compact files
- Faster processing
- Disadvantages:
- Serious problems if data contains the field separator
- Loss of precision with leading/trailing spaces
- Incompatibility with many standard software applications
- Usage: Not recommended; use only if certain that data contains no problematic characters
Recommendation: Always use double quotes (") to ensure maximum compatibility and data protection, especially in the presence of complex text or addresses containing commas.
Separation Configurations
Separation Configurations
This section controls the characters used to structure and organize data in the CSV file, defining how fields, rows, and multiple values are separated.

"Field Separator": defines the character that divides columns in the CSV file:
-
Comma (,) - International standard
- Format: "Field1","Field2","Field3"
- Universal compatibility with all software
- Recommended for most use cases
-
Semicolon (;) - European standard
- Format: "Field1";"Field2";"Field3"
- Used in countries that employ comma as decimal separator
- Compatible with European locale settings in Excel
-
Tab (\t) - Tab separator
- Invisible but very effective for complex data
- Ideal when text contains commas and semicolons
- Excellent readability when opened in text editors
Row Separator: determines the character that indicates the end of each record:
-
LF (\n) - Line Feed (Recommended):
- Unix/Linux and modern macOS standard
- Optimal compatibility with modern software
- Reduced file sizes
-
CRLF (\r\n) - Carriage Return + Line Feed
- Traditional Windows standard
- Required for compatibility with legacy Windows software
- Slightly larger files
-
CR (\r) - Carriage Return
- Classic Mac standard (pre-OS X)
- Rarely used in modern systems
- Maintained for historical compatibility
Multiselect Picklist Separator: handles fields that can contain multiple values:
-
Double Pipe (||) - Recommended
- Example: "Value1||Value2||Value3"
- Distinctive separator that rarely appears in data
- Easy to identify and process programmatically
-
Semicolon (;)
- Example: "Value1;Value2;Value3"
- More readable alternative for end users
- Caution not to confuse with field separator
-
Comma (,)
- Example: "Value1,Value2,Value3"
- Not recommended if comma is also the field separator
- Can cause interpretation issues
Practical Usage Examples
Multiselection field "Product Categories":
- With ||: "Electronics||Computer||Gaming"
- With ;: "Electronics;Computer;Gaming"
- With ,: "Electronics,Computer,Gaming" (problematic if , is field separator)
Recommendation: Use comma (,) as field separator, LF (\n) as row separator, and double pipe (||) for multiselections to ensure maximum compatibility and clarity in data structure.
Output File/Folder Management
This section defines settings for output file management, including destination, notifications, and naming of the final CSV file.

-
Export Folder: displays the destination path where CSV files will be saved:
- Base path:
storage/CSVExporter/ - Structure: The system automatically creates a subfolder for each module
- Example:
storage/CSVExporter/Accounts/for the Account module
- Base path:
-
Export Notification Mode: controls how the user is informed upon operation completion through:
- Block: alert that blocks the user interface
- Alert: displays a non-blocking notification
-
File Name: The file name configuration comprises two fundamental elements that determine how the final CSV file will be named:
-
Type: The system offers two approaches for file name creation. "Static" mode always maintains the same name for each export, ensuring predictability and ease of identification, but carries the risk of overwriting previous versions. "Dynamic" mode automatically generates unique names using variable criteria such as timestamps or incremental numbers, thus preserving export history but creating less predictable names.
-
Name: defines the identifying base of the CSV file. In the example shown,
Accounts_exportwill automatically becomeAccounts_export.csvonce the export is completed. It is essential to use descriptive names that reflect the file content, avoiding special characters or spaces that could cause compatibility issues with different operating systems. Examples of effective naming includeActive_customers_2025,Monthly_orders_march, orPaid_invoices_2025, which provide immediate information about the content and reference period of the exported data.
-
Field Mapping
Step 3 Wizard
Mapping - Introduction
The third step defines the correspondence between VTE module fields and the columns that will appear in the final CSV file. This phase is crucial for determining which information will be exported and how it will be structured.
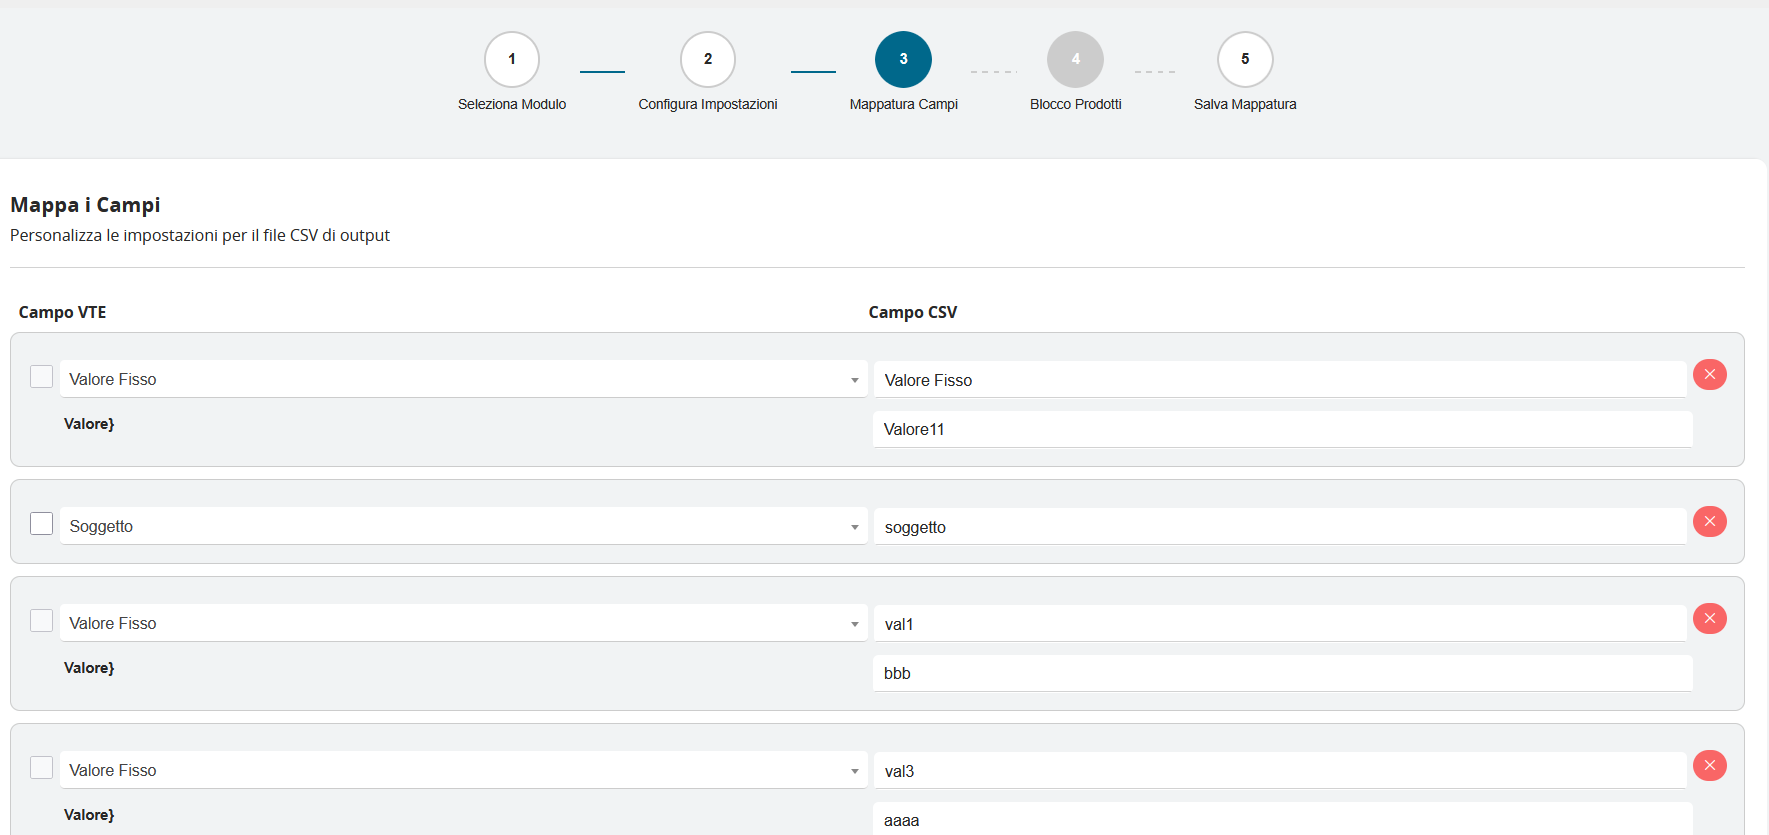
The mapping interface is organized into two main columns that work together in a coordinated manner:
Left Column - VTE Field This section displays the available fields in the selected module, with specific characteristics:
- Selection checkbox: Allows including or excluding each field from the export
- Field name: Descriptive label of the field in the VTE system
- Field type: Automatic identification between dynamic fields and fixed values
Right Column - CSV Field This section defines how fields will appear in the output file:
- Column name: Label that will appear as header in the CSV
- Editable field: Ability to fully customize the column name
- Removal control: X button to delete individual mappings
Mapping Types
The system supports different mapping types to adapt to specific needs:
Dynamic Fields Dynamic fields represent real data extracted from the database:
- Example: "Subject" → "subject"
- Function: Transfers the actual field value from the VTE record
- Customization: The CSV column name can be modified while maintaining the data link
Fixed Values Fixed values allow inserting static information in every row:
- Example: "Value}" → "Value11"
- Function: Inserts the same predefined value in all exported rows
- Usage: Ideal for identifiers, categories, or common metadata
Mapping Management
Field mapping is handled through:
Field Selection:
- Active checkbox: Field is included in the export
- Inactive checkbox: Field is excluded from the export
- Granular control: Ability to select only necessary fields
Column Name Customization
- Direct editing: Click on the field to edit the CSV column name
- Conventions: Ability to adopt specific naming standards
- Clarity: Use of descriptive names to facilitate data interpretation
Mapping Removal
- Red X button: Completely removes the mapping
- Immediate action: Instant removal without confirmation
- Flexibility: Ability to reorganize the field list
Practical Mapping Examples
Scenario 1 - Contact Export
- VTE Field: "Company Name" → CSV Field: "company_name"
- VTE Field: "Primary Email" → CSV Field: "email"
- Fixed Value: "Type" → CSV Field: "customer_type" (value: "Customer")
Tip: Start with essential mapping including only indispensable fields, then gradually expand by adding additional fields based on specific project requirements.
Dynamic Mapping Field Management
The system offers the ability to dynamically expand the configuration through the "+ ADD FIELD" button, which represents a fundamental tool for advanced export customization. When this button is clicked, the system immediately adds a new blank mapping row at the end of the existing list, allowing inclusion of additional fields that may not have been considered in the initial configuration.

Product Block - Special Configuration
Step 4 wizard
Product Block Activation
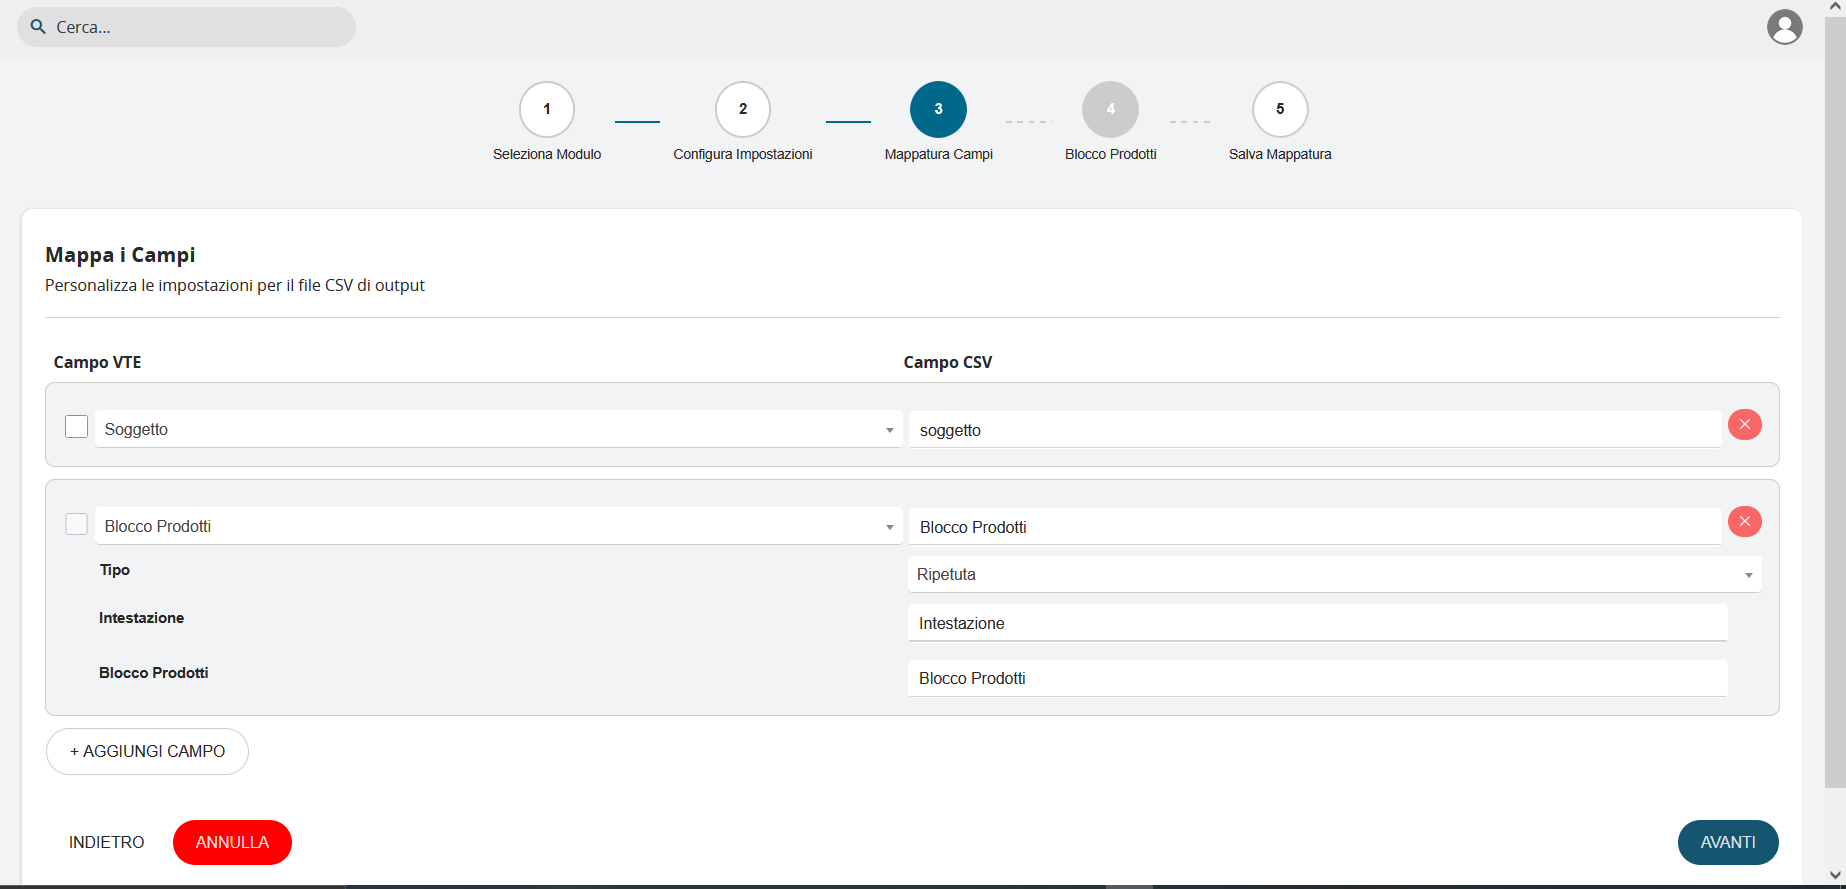
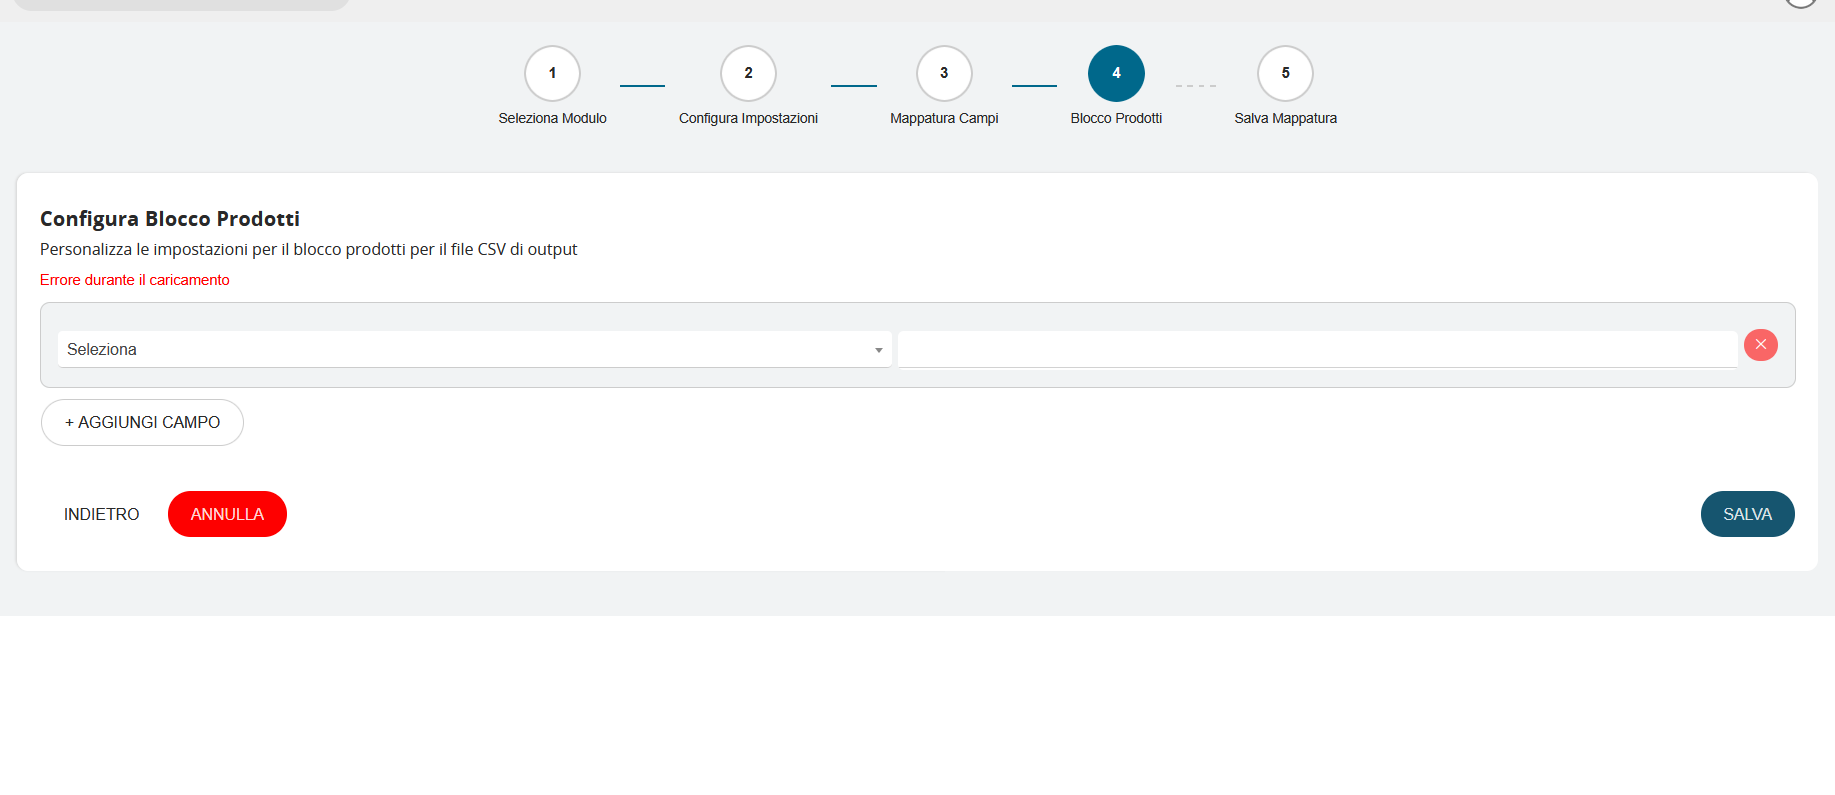
The fourth step of the wizard is activated exclusively when the "Product Block" field has been selected in field mapping (Step 3). This step represents a specialized configuration that handles the complexity of product data, requiring additional settings to define how associated product information should be structured in the final CSV file.
If the "Product Block" field has not been included in the mapping, the wizard proceeds directly from Step 3 to Step 5 (Configuration Save), completely skipping this phase.
Advanced Product Block Configuration
The screen maintains the same mapping structure as Step 3, but focuses exclusively on product-related fields. The system presents all available fields for products of the selected module, allowing targeted selection of information to export.

The interface again presents the two main columns working in coordination:
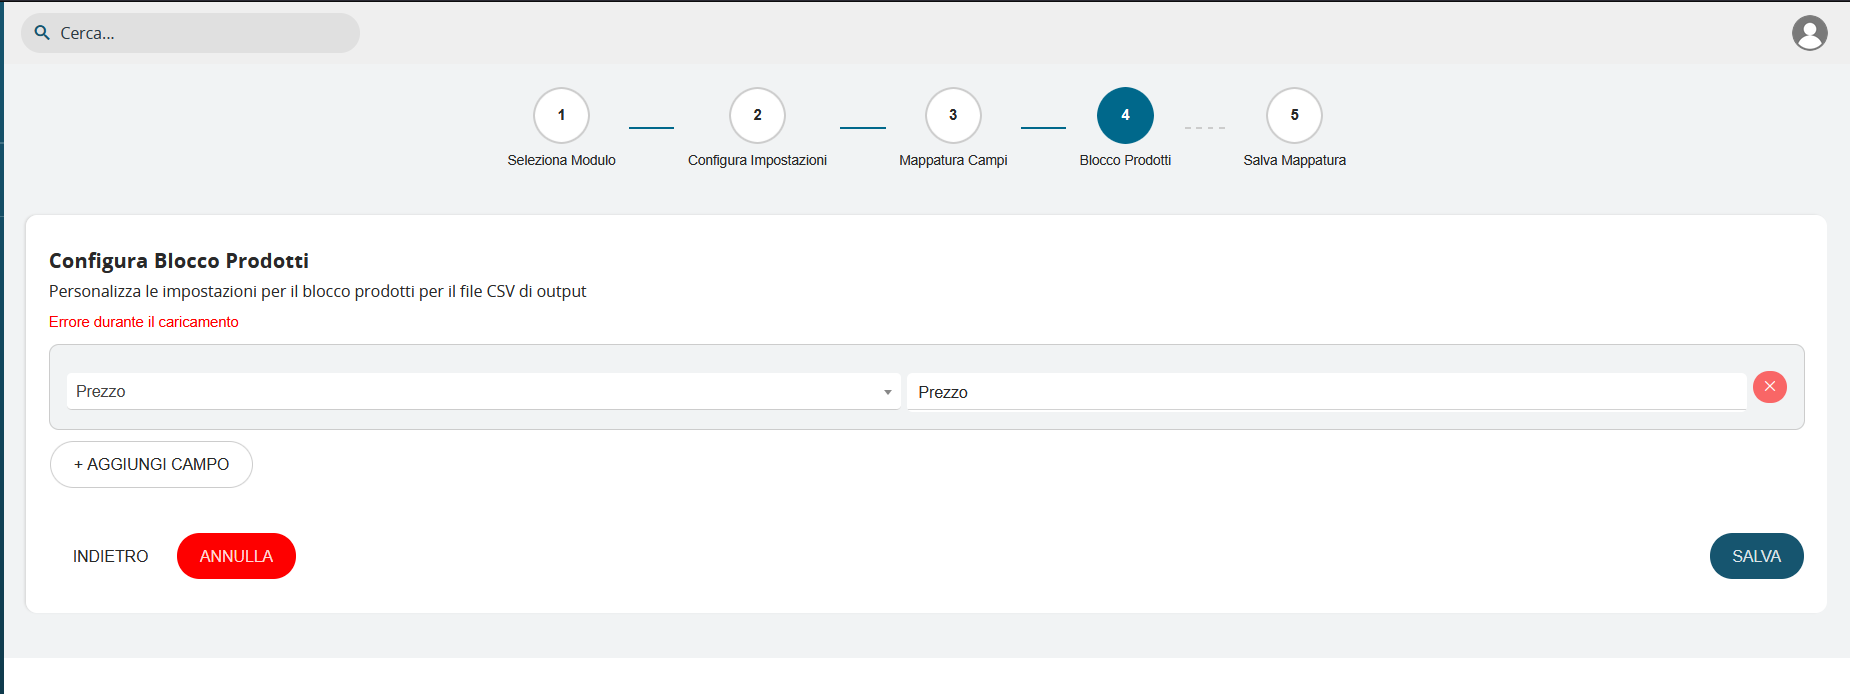
VTE Field Column: Displays the specific product block fields available in the system, such as "Subject," "Product Block," "Type," "Header," and other product-specific attributes.
CSV Field Column: Allows defining how these product fields will appear in the final CSV file, with the ability to fully customize column names.
The system implements an intelligent field inheritance mechanism: when a main field containing sub-structures is selected, the system automatically inherits all connected fields, presenting them in the configuration to enable complete and detailed mapping.
The true power of this configuration emerges when selecting complex fields such as "Split Discount." In this case, the system automatically recognizes that this field contains an articulated data structure and presents all associated sub-fields to the user. Therefore, with "Split Discount," the system automatically expands the mapping showing all specific components:
- Discount Percentage 1: First level of applicable discount
- Discount Percentage 2: Second level of applicable discount
- Discount Percentage 3: Third level of applicable discount
- Discount Percentage 4: Fourth level of applicable discount
- Discount Percentage 5: Fifth level of applicable discount
- Discount Amount: Absolute value of the applied discount
This approach ensures that no important data is lost during export and that the user always has complete control over the final CSV structure, being able to decide which specific sub-fields to include or exclude from the export.

Mapping Save
Step 5 Wizard
Configuration Finalization
The fifth and final step of the wizard concludes the module configuration process. In this phase, the system confirms that all settings have been saved correctly and provides options to return to operational management.
In this phase, the system has completed three fundamental operations:

- Settings Validation Verifies that the configuration is consistent and correct (e.g., valid field mapping, compatible CSV format, etc.).
- Permanent Save All data is securely stored for future use. The configuration can be modified or reused at any time.
- Module Activation The configured module becomes immediately available on the plugin homepage, ready for export.
IMPORTANT NOTE: The wizard completion is "not just the end of configuration," but the beginning of practical, fast, and customized use of the CSV export system within the chosen module. Once saved, each configuration becomes a ready-to-use tool, optimized to make data export simple and efficient.
